Showing posts with label easy. Show all posts

Tuesday, January 24, 2012

More Valentine Boxes

Valentine boxes are HANDS DOWN my favorite craft activity to do with my kids.  {Can you tell?}  OK, Mommy did help her kindergartner quite a bit with this version of the Tissue Box Monster idea from Family Fun Magazine. {The marabou feather eyelash were all mine!} The ears are foam hearts folded and hot-glued in half and the teeth are white felt.  Don't you love that faux alligator paper?
 My son unseated the four-time classroom Valentine box champion with this front loading washing machine box. {She was the room mom's daughter and quite heart broken about not winning the coveted prize, but hey, you can't win 'em all.}  We just printed out logos from the internet and used that weird sculpting stuff to look like bubbles. (Leave me a comment if you remember what it's called!) The washing machine door was the lid to a box of pretty dishes I received. (I'm always looking out for boxes that I can use for just this type of project!)

We just happened to have a box with a cute window for this cell phone box, but you could use a cereal or shoebox for this too and create your own cool text display.  The buttons are fun foam that we stamped numbers on.
Here are the super easy Valentines Kate made.  The inside says "you're out of this world" and we colored the eyes and flower with a white gel pen.  So, what are you making this year for Valentine's Day?  Leave me a note or a link to your creations.

Valentine Treat Cone


This is a sweet and unique Valentine treat to try this year!  I originally got the idea from Martha Stewart's site, but she didn't have step-by-step instructions.  (Hopefully you will have better luck with my pictures ;)


1. Start with square paper (mine was 6"x6") and fold corner to corner in both directions, in half both directions, then push in two opposite corners, so that it looks like the photo.
2. Use an oval shape cutter or a heart shape that you have to make a heart pattern on the square with the folded point down.

 3. Cut the round portions of your heart shape, making sure that the folds are on the bottom.
 4. Push in the the inside valley folds so that it forms a cone or cup shape.
 (It's hard to hold it and take a picture!)
 5. Use some adhesive or a stapler to affix the center portion and add holes, if desired to hang a tag (or hang the treat up, like from a door knob or a coat hook.)
 Wouldn't a pile of these make a pretty centerpiece on a round table?
 Leave me a note if you try these out.  They are not as hard as they look, I promise!

Thursday, December 8, 2011

Easy Holiday Teacher Treat: Hand Santa-tizer


There's a sign near the front desk at my children's school that reads "Please Don't Feed the Office Staff!"

So what do you give as a little treat at the holidays that is low-cal and inexpensive, yet useful and shows that you appreciate the folks you work with or that work with your kids?

Hand SANTA-TIZER!

I chose the purse size, because it's portable, inexpensive and who wants a Christmas anything that lasts beyond January?  I got this idea from Pinterest and they didn't look the same, but there are cute bottles with the same play on words for sale here: https://www.facebook.com/pages/Double-C-Tree-Farm/126311947405714

My version was pretty easy to do in multiples and I based the paper size on the bottle I found, so you will have to get out your ruler.  The fuzzy trim is made with mulberry paper that I scored, folded and did that trick to tear paper by moistening it on the fold.  That's how I got the fuzzy edges.  (If you don't have mulberry paper, try a coffee filter for a similar effect.)

The belt is Sizzix self-adhesive "leather" paper and I punched buckles with a die cut from gold Creative Memories paper.  I wanted to do an additional tag with a cute saying, but I opted for simple stickers on the back with a fun Santa stamp.  Pretty simple, but they were a HUGE hit!  Leave me a comment if you decide to make these. Merry Christmas!

Friday, October 21, 2011

Simple and Spooky Halloween Party Drinks


 Bring these simple and fun drinks to your next Halloween or Pumpkin Carving Party!  Instructions and a printable download follow. First check out this inexpensive and kid friendly hostess gift!  Peel the label from an orange soda 2 liter bottle and add a simple pumpkin face with Contact paper.
 They sell some that has a blackboard finish, but I didn't have any and I'm super impatient, so I spray painted some that I had.  Just be careful when working with it, because the paint can fall off.
  I Googled B&W pumpkin faces on my phone and drew on the back of the paper. (I also cut a portion of the label I had peeled off and stuck it to the portion of the bottle where I couldn't get the sticky gunk off.  That will be the back and if they are curious about whether it was Sunkist or generic, they can check the back.  Generic is usually how I roll ;)
Last, I added a punched out leaf shape and some green curling ribbon.  This looks so cute and it only cost me about $1!
Next I did a project for the big people (but you could get orange or grape soda in the cartons for kids.  Just don't bring cartons of both to the same party.  Once they have labels, it's real easy to liquor up the kid down the street when he accidentally gets a Mike's Margarita instead of the lemon lime soda he was expecting.  TRUE STORY! {Sorry Ryan!}
  Add fun labels to the bottles.  (My favorites are "Truth Serum" and "Wart Tonic")
When the bottles are gone, you can use the carton as a utensil dispenser. (And it folds flat to store until next year. BRILLIANT!)

Here are some awesome places to get labels:


Kristine McKay' Spooky Labels

Or print your own drink carton label right here:
Carton Label on Scribd

If you are loving the drink carton idea, check out my summer version:

http://paperjewels.blogspot.com/2010/07/summer-snack-pack.html

Sunday, June 28, 2009

Inexpensive Vase for Floral Centerpiece


Or maybe a quick and easy
Thinking of You Gift . . .
I am in the midst of busy summer craziness, but I made a little video to show you how to turn a recycled bottle into a gorgeous and thoughtful little gift.

I just read Regina Brett's 45 life lessons and one of them reads,
"Burn the candles, use the nice sheets, wear the fancy lingerie. Don't save it for a special occasion. Today is special."
So go pick a flower from your garden and make someone's day!

Tuesday, February 10, 2009

Valentine Boxes


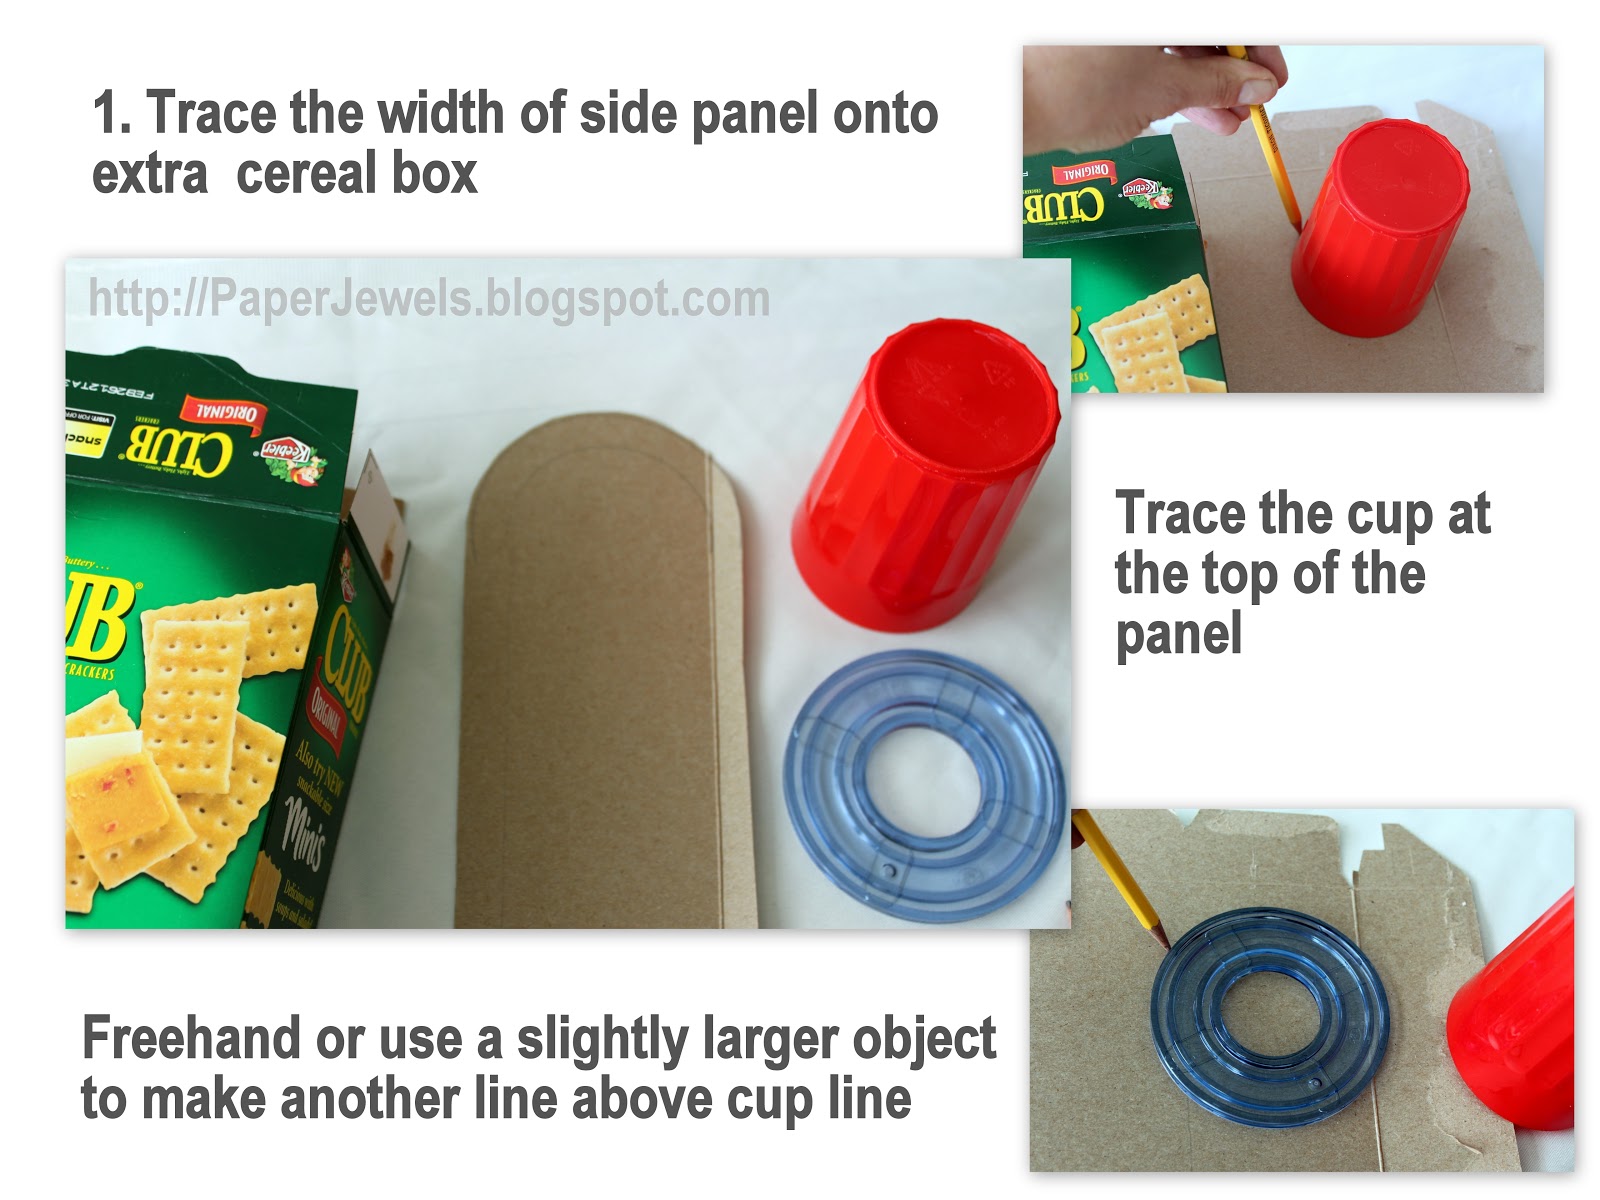
Do your kids make boxes to bring to class for their valentines? Here's what my girls and I came up with last night. Katelyn's is made out of a frozen waffle box and some extra cereal box for the rounded top. It's reminiscent of the street corner type mailbox. Isn't the flap cute?
{Instructions below!}


Lily's preschool class has six students, so this cereal box turned ipod is just the right size. Katelyn gave me the idea to make earbuds out of two foam hearts stuck together. Isn't she a paper crafting genius? I wonder where she gets that from?


So here are instructions on how I made the Valentine Mailbox:


Happy Valentine's day!