Pages

Thursday, July 31, 2008

Make Your Own Flowers - Coffee Filter Edition

I've seen some super cute ideas lately for making your own Prima flowers and felt flowers, so I thought I would share another idea I got from my friend Leslie. This is super cute and super frugal--it's coffee filters!


Tips:
You can use a variety of die cutting tools. If you use a punch, you'll want to use the more sturdy size 4 cone cofee filters. For the Cuttle Bug, Quick Kutz, Side Kick and bigger Sizzix machines, anything goes. I especially like the Big Shot type dies because you can fold a stack of filters into a triangle shape to focus on one portion of the die and going through lots of layers. This makes a ton of flowers in a hurry!


Ink them Up!
Another tip is to ink the edges, dye the whole flower with re-inkers or stamp on the flowers. You can achieve so many looks by adding a little ink!


Mix and Stack Them Up!
Check out the samples below for ideas on mixing coffee filter flowers with paper, cardstock, Bazzill Bitty Blossoms or other flowers.


Finish them Off!My favorite way to give flowers the finishing touch is with a fun brad.

Friday, July 25, 2008

Circle Sketch on a 12 x 12 Layout

This layout was featured at The Angel Company's seminar as part of their Reece showcase, and will be on display at the scrapbooking shows TAC is participating in.

I had fun playing off the circles in the Reece paper and on this new set, Affirmation Badges, but I wanted to do a square page. (It fits better into an album.) So, I just used a circle sketch and put it on top. There's a lot going on, but I think you still notice the smiles. This is my daughter Liliana and me while visiting New York for the holidays last year.

To make the word "cherished" really stand out, I stamped once on a darker paper and once on a lighter, cut out the section with the word and popped it up.

When I first started scrapbooking, handwriting idea books and plastic templates to draw and cut out all sorts of shapes were all the rage. I also bought a bunch of these "Border Buddies" that had unique edges you could trace along and/or cut out. So, as a nostalgic touch, I used an edge that is kind of scalloped shape--kind of like a parenthesis mark. I think I like it!

Click on the photos below for more detail. I used my white Extreme Gel Pen to color in the little flowers of my Floral Labels journaling block. I like that little touch. Ciao!


Wednesday, July 23, 2008

Holiday Ornaments


These are fast, fun and frugal. In fact, they would be great for kids' projects. If your kids are bored this summer, this would be a good way to keep them busy and get a jump on little teacher, grandma and neighbor gifts. (Mine are in school right now on their year-round schedule but off all of December, so I'll tuck this idea away with my other kids' holiday ideas.)


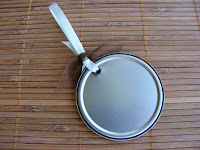
Anyway, the first one is made with juice lid. Save all those lemonade lids now! Just a couple of punched circles, some hardware and ribbon and you're done. (Remember Barb challenged me to come up with a project with those lids?) I also added a little tag I made with some frosty acetate I had hanging around.


The second one uses a 6x6 square of cardstock and a Scor-Pal. Jen Young did a tutorial at the Scor-Pal site. For a printable copy, click here. It's really very easy to make. I also did a version with burgundy paper and shaped it to look like a poinsettia flower.


Supplies (Click to view product or Order)
Stamp Set: Vintage Chrismas
Inks: Palette Bordeaux, Versamagic Jumbo Java


Sunday, July 20, 2008

6x9 Holiday Layouts


This is becoming a popular size for scrapbooks. It's small enough to be unintimidating, but big enough to hold a picture, some journaling and some decoration. These are decorated with Reece paper and two new stamp sets from The Angel Company.
Need something to hold your 6x9 pages? Try the Making Memories flocked chipboard albums. I think the chocolate one would be yummy! (To see all the colors we carry, click here.)


Reece Christmas Cards


Here's more holiday inspiration with the Reece Soar With It Collection from The Angel Company! I meant to post much sooner, but I was busy getting ready for and attending a crop and was so tired last night when I got back from my crop!

To add a little extra shine to both of these cards, I used one of my favorites: Transcendence Embossing powder. You've probably heard me mention it before, but I use it constantly on my projects. It works equally well with the rich Versamagic green ink on the first card and my go-to ink, Palette on the second card. You simply add a sprinkle right after stamping (work fast for dye and hybrid inks) and you get that raised shine in the exact color you want.

Supplies (Click to view product or Order)
Stamp Sets: Joy of Christmas, Trendy Greetings and Vintage Chrismas
Paper: Reece Soar With It Collection and Cardstock
Inks: Palette Burnt Umber and L'Amore Red, Versamagic Hint of Pesto and Aspen Mist
Accessories: Reece Ribbons Red Stickles and Antique Safety Pins

For my piercing tips, click here. For more info on that flower, stay tuned. More Transcendece Projects: Embossed Leather Journal
Embossed Stones

Friday, July 18, 2008

Christmas In July with TAC

You're Invited!
All weekend I'll be sharing Christmas in July projects featuring The Angel Company's new Reece Soar With It Collection.

This invitation incorporates one of the new holiday sets: Joy of Christmas and the Celebration Invitation set I used on my bunco calendar. I used TAC's brown cardstock, which is so rich and sturdy and the new Antique Copper Hardware. Both of these items will go with almost every paper collection. They are MUST HAVES! For ribbon, I used both the Reece Ribbons and the Neutral Twill ribbon pack. That is so fun to stamp on! Did you notice I used my Palette Burnt Umber to stamp "Party Party Party". You can stamp on metal, wood and even glass with Palette. Just hit it with your embossing gun to set it.

Get a Jump on the Holidays!
Grab all your holiday papercrafting supplies now and stay tuned for more inspiration for gifts and greetings you'll treasure. Are you on my Specials & Events mailing list? Get signed up in the column on the right. I'll be offering a special Holiday Bundle for my subscribers!


Tuesday, July 15, 2008

Reece Bunco Fridge Calendar

Do you have an event that you look forward to every month? Well, aside from my scrapbooking and crafty get-togethers, I look so forward to Bunco! It's Mom's night out to just have fun!

You can make your own fridge calendar with chipboard, cardstock and The Angel Company's new Reece Soar With It Collection. It would also be great for kids' sports schedules. If you'd like to print calendar sheets, GO HERE for a free program. You can also make fun invitations with the new Celebration Invitation set. Heather's got a cute sample here. This set was given as an award at TAC's recent Seminar. If you have a sample with this fun set, leave a comment with a link to your creation. There are countless things you can do with it! Below is a peek at the fun from our last Bunco night. (I hope you gals don't mind --- or is it "what happens at Bunco stays at Bunco?" Oops. )

Sunday, July 13, 2008

Right Size Photos for every Scrapbook Layout

Here's the last of the Willoughby designs I did for the new TAC Inspiration Book. It's a 6x9, which is a fun size, and if you follow my blog, you know I love to scrapbook in a variety of sizes. I especially love making mini scrapbooks.

People often ask me about how I get all the different sizes of photos for my layouts. I'm the kind of person who gets up really close with my camera, so inevitably, faces fill right up a 4x6 print. Some services offer a wallet size, but I'm too thrifty to pay more for prints.

That's when I discovered Shutterfly's free "Studio" software. Download it here. It organizes and enhances your photos like other programs, but the Collage function is really great. You pick a template and just drag and drop pictures into it. When you export the collage as a jpeg it can be printed with your other regular prints. I use the 4x6 template most of the time, so it costs the same as regular pictures.

You can add titles to the collages as well, so I use them for my family blog and even holiday cards. If you've been timid about trying digital scrapbooking, these collages might be a good compromise. I've made little books entirely out of 4x6 collages. They are fast and fun! Check out my Easter one here and my Oblinski books here.

Drop me a line if you have questions or leave a comment with a link to your favorite mini book or scrapbook layout.

All Supplies from The Angel Company: Willoughby paper and cardstock, Willoughby Ribbon, Antique Copper Hardware, Palette Burnt Umber ink, Stamp Sets: Artsy Elements, Decorative Corners.

Wednesday, July 9, 2008

Mitered and Decorative Corners


This Willoughby project from the new Inspiration Book is one of those canvas stampable frames that I covered with paper and stamped with the new Decorative Corners set (one of my new favorites.)

I also used the tags and coordinating ribbon that come with the Willoughby paper.

To find out how I made those mitered corners, see this post: Family Photo Frame

This technique could be used on anything, from cards to scrapbook pages. Add some pop dots and a little acetate and you've got a great frame embellishment for the front of a mini book.
PS- That's my son, Jack, during a hike in Vail last Fall. To see what 0ther adventures we've been up to, check out The303Griffiths.

Tuesday, July 8, 2008

Embellish with the Bind It All


One of my favorite layouts that I designed for The Angel Company's new Inspiration Book features my daughter Katelyn and the new Willoughby collection. What a great combination.

I added the punched detail on the left with my Bind It All and knotted ribbon through the holes. I love finding new ways to use my tools. This all-in-one punches holes as well as applies the binding wire to make the handiest books, like the one that is currently featured on the TAC web site. (While you're there, register to win some Toodle Loo paper!)
You can also make that notebook paper look, like the detail on this page by snipping away a little bit at the edge with scissors. It's such a fun look, and just another way you can use this cool tool!

You can get your Bind It All for HALF PRICE by having a workshop with TAC. A $100 order qualifies as a workshop, so you can show a catalog to a few friends and have an instant party! In addition to getting an item at half price, you recieve a free Hostess Set and as the hostess all your items are 20% off! Email me to get your catalog or to place an order today.