Pages

Tuesday, January 24, 2012

More Valentine Boxes

Valentine boxes are HANDS DOWN my favorite craft activity to do with my kids.  {Can you tell?}  OK, Mommy did help her kindergartner quite a bit with this version of the Tissue Box Monster idea from Family Fun Magazine. {The marabou feather eyelash were all mine!} The ears are foam hearts folded and hot-glued in half and the teeth are white felt.  Don't you love that faux alligator paper?
 My son unseated the four-time classroom Valentine box champion with this front loading washing machine box. {She was the room mom's daughter and quite heart broken about not winning the coveted prize, but hey, you can't win 'em all.}  We just printed out logos from the internet and used that weird sculpting stuff to look like bubbles. (Leave me a comment if you remember what it's called!) The washing machine door was the lid to a box of pretty dishes I received. (I'm always looking out for boxes that I can use for just this type of project!)

We just happened to have a box with a cute window for this cell phone box, but you could use a cereal or shoebox for this too and create your own cool text display.  The buttons are fun foam that we stamped numbers on.
Here are the super easy Valentines Kate made.  The inside says "you're out of this world" and we colored the eyes and flower with a white gel pen.  So, what are you making this year for Valentine's Day?  Leave me a note or a link to your creations.

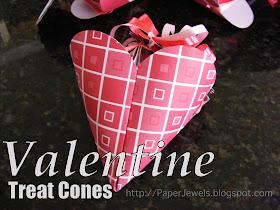
Valentine Treat Cone


This is a sweet and unique Valentine treat to try this year!  I originally got the idea from Martha Stewart's site, but she didn't have step-by-step instructions.  (Hopefully you will have better luck with my pictures ;)


1. Start with square paper (mine was 6"x6") and fold corner to corner in both directions, in half both directions, then push in two opposite corners, so that it looks like the photo.
2. Use an oval shape cutter or a heart shape that you have to make a heart pattern on the square with the folded point down.

 3. Cut the round portions of your heart shape, making sure that the folds are on the bottom.
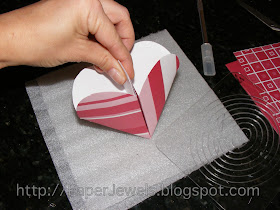
 4. Push in the the inside valley folds so that it forms a cone or cup shape.
 (It's hard to hold it and take a picture!)
 5. Use some adhesive or a stapler to affix the center portion and add holes, if desired to hang a tag (or hang the treat up, like from a door knob or a coat hook.)
 Wouldn't a pile of these make a pretty centerpiece on a round table?
 Leave me a note if you try these out.  They are not as hard as they look, I promise!